
On this page
Overview
Microsoft Entra ID fetcher enhances your workflow by automating data collection. To use the fetcher feature, you must first establish a connection to the third-party application. We utilize connectors to enable precise data collection with minimal user input.
NOTE: The steps provided on this page may require the assistance of your internal team’s Microsoft Entra ID admin and a ZenGRC Pro Admin.
Microsoft Entra ID Configurations
To use the Microsoft Entra ID fetchers, you must create an Enterprise Application in Microsoft Azure, and obtain its credentials.
These credentials, along with your tenant ID, will be used to create a Microsoft Entra ID connection.
How to Generate Microsoft Enterprise Application Credentials
-
Register an application with the Microsoft Identity platform
-
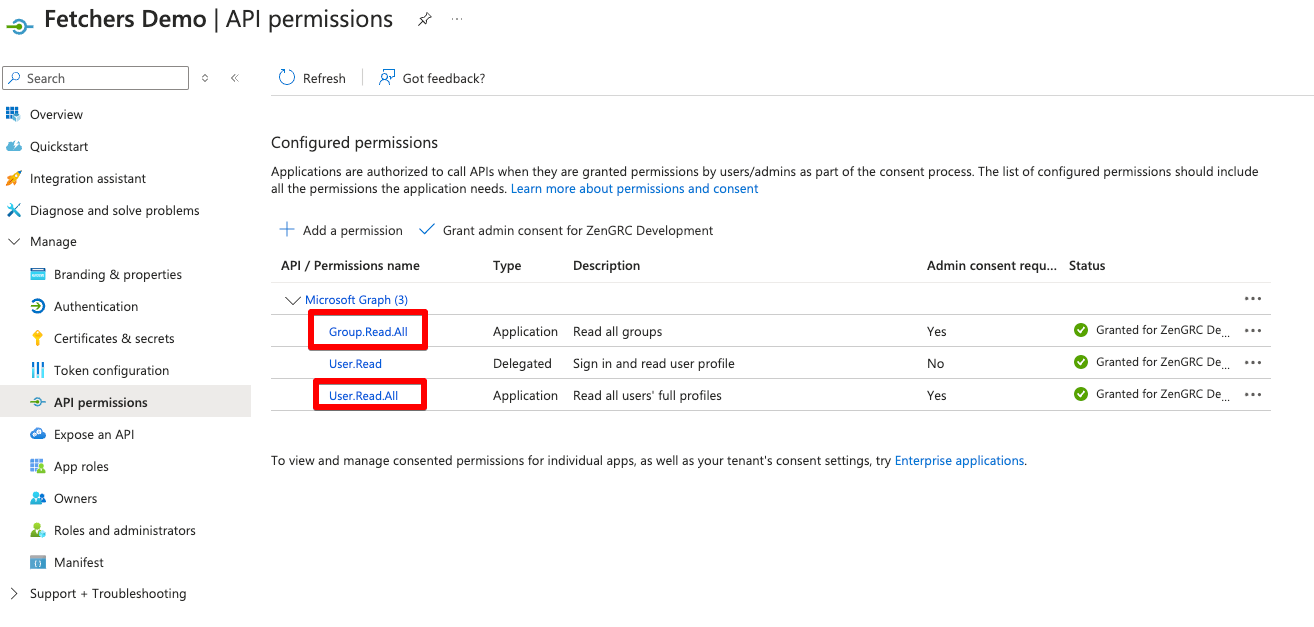
Grant your application permission to access the Microsoft Graph API
-
Your application must have these specific permissions:
-
User.Read.All -
Group.Read.All
-
-
These permissions must be of type
Application -
Admin consent must be granted
-
Connector Setup
Creating a Connector
This process only needs to be completed once. Once a connector has been established, fetchers can be created on any object.
Learn more:
ZenGRC Classic:
ZenGRC Pro:
Creating a Fetcher
Fetchers can be customized for specific data retrieval needs and are supported across a range of object types.
- Available Fetchers for Microsoft Entra ID:
- List of Users: which retrieves an attachment with a list of all users.
- List of Groups: which retrieves an attachment with a list of all groups.
- Fetchers run periodically, with a slight delay possible based on queue size. Please allow at least 5 minutes past the scheduled time for updates.
Parameters
For Microsoft Entra ID, no parameters are required.
Managing a Custom Fetcher
Once created, your fetchers will run at the increment specified (daily, weekly, monthly, or yearly) until they expire or are removed. If no expiration date was set, fetchers will run until removed or the connection is deleted.
- Open the desired object and go to the Custom Fetchers tab.
- Click a fetcher from the list to open the fly-out
Here you will see details about past and upcoming fetches.
Fetcher Outputs
A fetcher needs to be added on a specific object. Each time it runs it either creates a new piece of evidence on the attachments tab or updates a field on the object itself.
Note: Each time a fetcher tied to a custom attribute runs, it replaces the information in the linked field with the most up-to-date information.
Fetch Now
To activate the fetcher immediately, click Fetch Now on the fetcher. This will enable the fetcher and have it run immediately.